
- Raymarching in TouchDesigner with RayTK

The following is an edited transcript from a talk I recently gave at Creative Code Toronto on November 20th, 2024. You can view a recording of the talk here
Hey guys, my name is Luc. I’m a creative developer from Toronto. Recently, I participated in Interaccess’ Open HDMI event for the second time. It’s basically like an open mic but you can do whatever visual you want in their 360 projection mapped room. I use it as an opportunity to experiment with new stuff outside of my day job, which mostly involves 3D web development.
One of the things that’s been kind of fun for me is TouchDesigner. It lets me do creative coding without actually using code, which is a nice change of pace. One of the tools I saw that got developed recently is called “RayTK.” So RayTK is basically a set of TouchDesigner components for doing this 3D rendering technique called raymarching.
Raymarching is this fancy technique for showing things in 3D using just one fragment shader. That means there’s no vertices, no meshes. If you’re familiar with 3D modeling in Blender or whatever, there aren’t any little points you drag around. A cube in raymarching isn’t defined by all those dots and connecting them. Instead, it’s just the math that represents the cube visually, and determining how it should look from a camera’s perspective lets you render it in 3D.
Right now isn’t the best place to explain what all that means in detail, but if you’re curious, I’d recommend checking out some videos by Inigo Quilez—he’s way better at explaining all the math and concepts involved. He’ll literally break down how you represent a box, how you represent a cube, all that stuff, including the math behind it.
Anyway, I think raymarching is a super interesting technique, and I’ve always wanted to be in a space where this stuff is happening all around me, so this was a great opportunity. The goal was to make it look like if you’re standing at the center of the 360 room, you’re immersed in the whole scene.
Here’s what I came up with: I created four scenes, and I set up a little viewer to see what it looks like as if you’re in the room, so I could test it out.
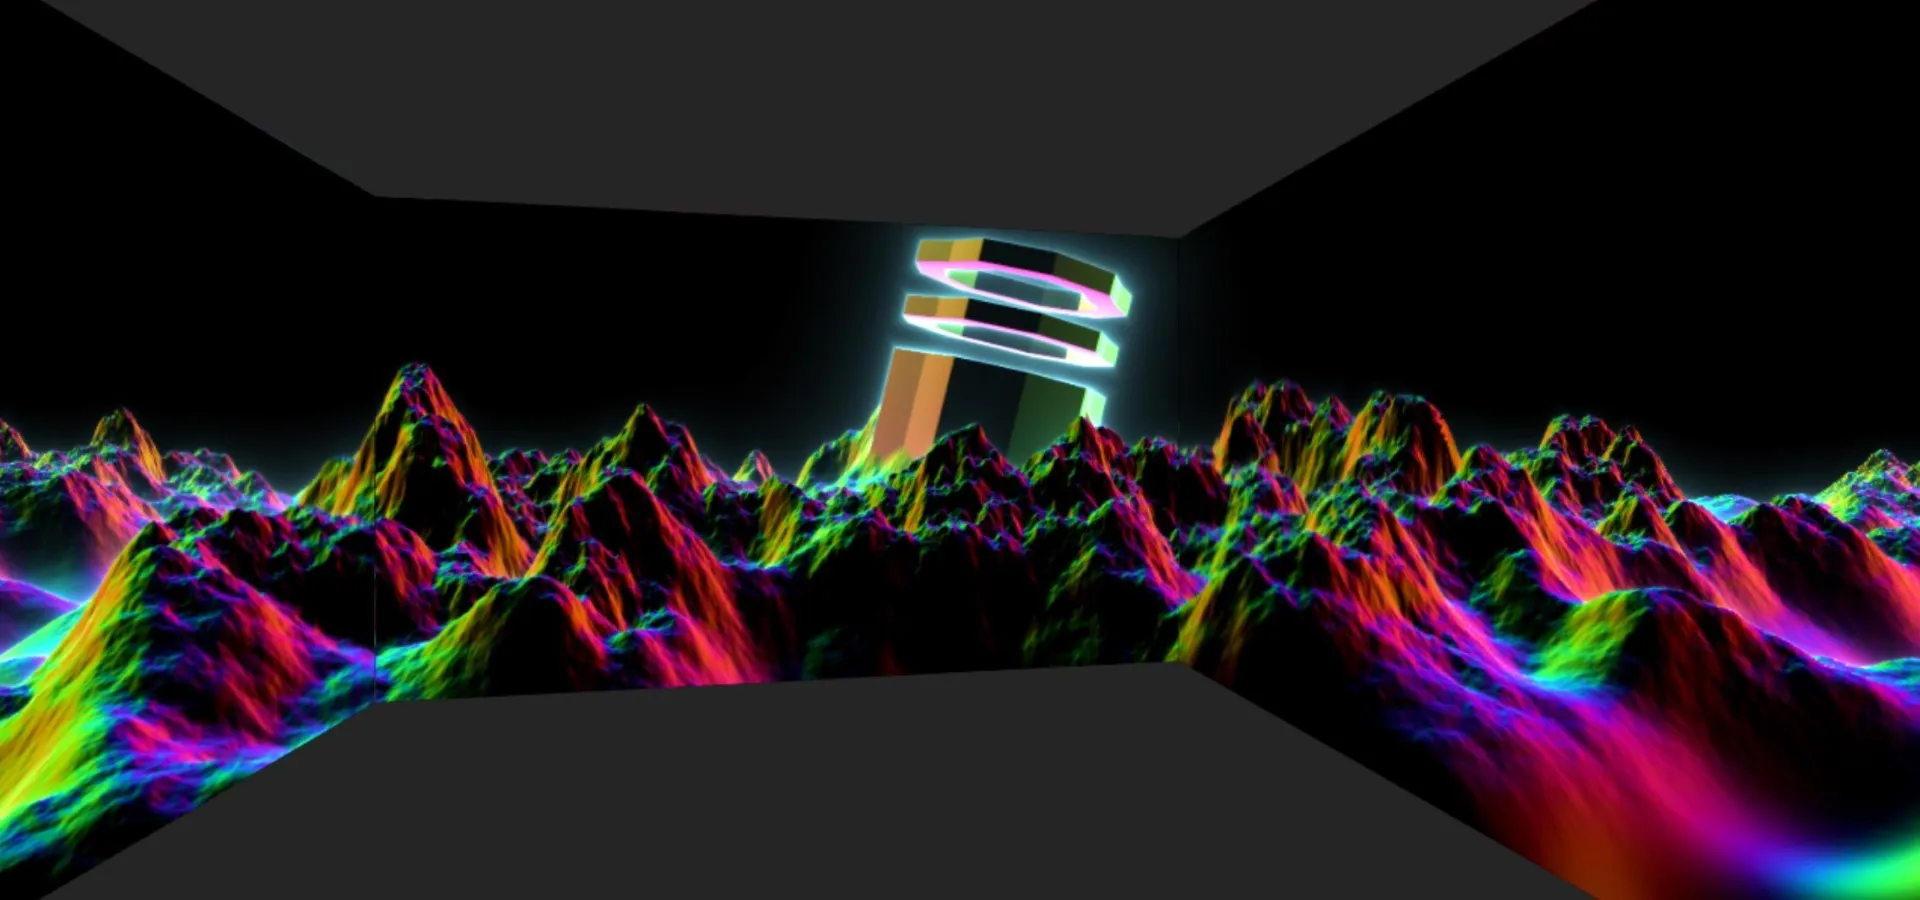
First I’ve got this cool mountain range thing. It’s not set up to transition between scenes in a super smooth way, but I wanted a little slider so you could fade to black, or just switch scenes.

I also made a cool piston scene.
And the other thing is, there was a DJ playing, so I wanted to make sure the scenes reacted to music in some way. Last time, I tried doing fully audio-reactive visuals, but it didn’t work out great. This time, I just went with a beat detection system—so I could tap a button to set the beat, and the visuals would react to it. The tapping thing is a component I downloaded online, basically. So yeah, the piston scene now reacts to the beat. You can transition it, and it has this little animation.
One thing that makes raymarching so cool is that doing “infinite” stuff is actually trivial. Like, literally mathematically infinite. That’s what’s happening here—there’s an infinite number of piston chains, and I’m not even keeping track of it. In a game engine, you’d have to do a bunch of tricks to render an infinite number of things, like object pooling or juggling between the objects that are visible, but with raymarching, I can just say, “take this object and infinitely repeat it this way,” and it just works.

The other two scenes I made are based on some off-the-shelf fractal functions that RayTK provides. I didn’t spend much time on them, but honestly, they turned out the best. I put in some sliders to adjust the fractal and tweak the color a bit. One of them is more of a traditional fractal look where I can increase the resolution and the complexity.
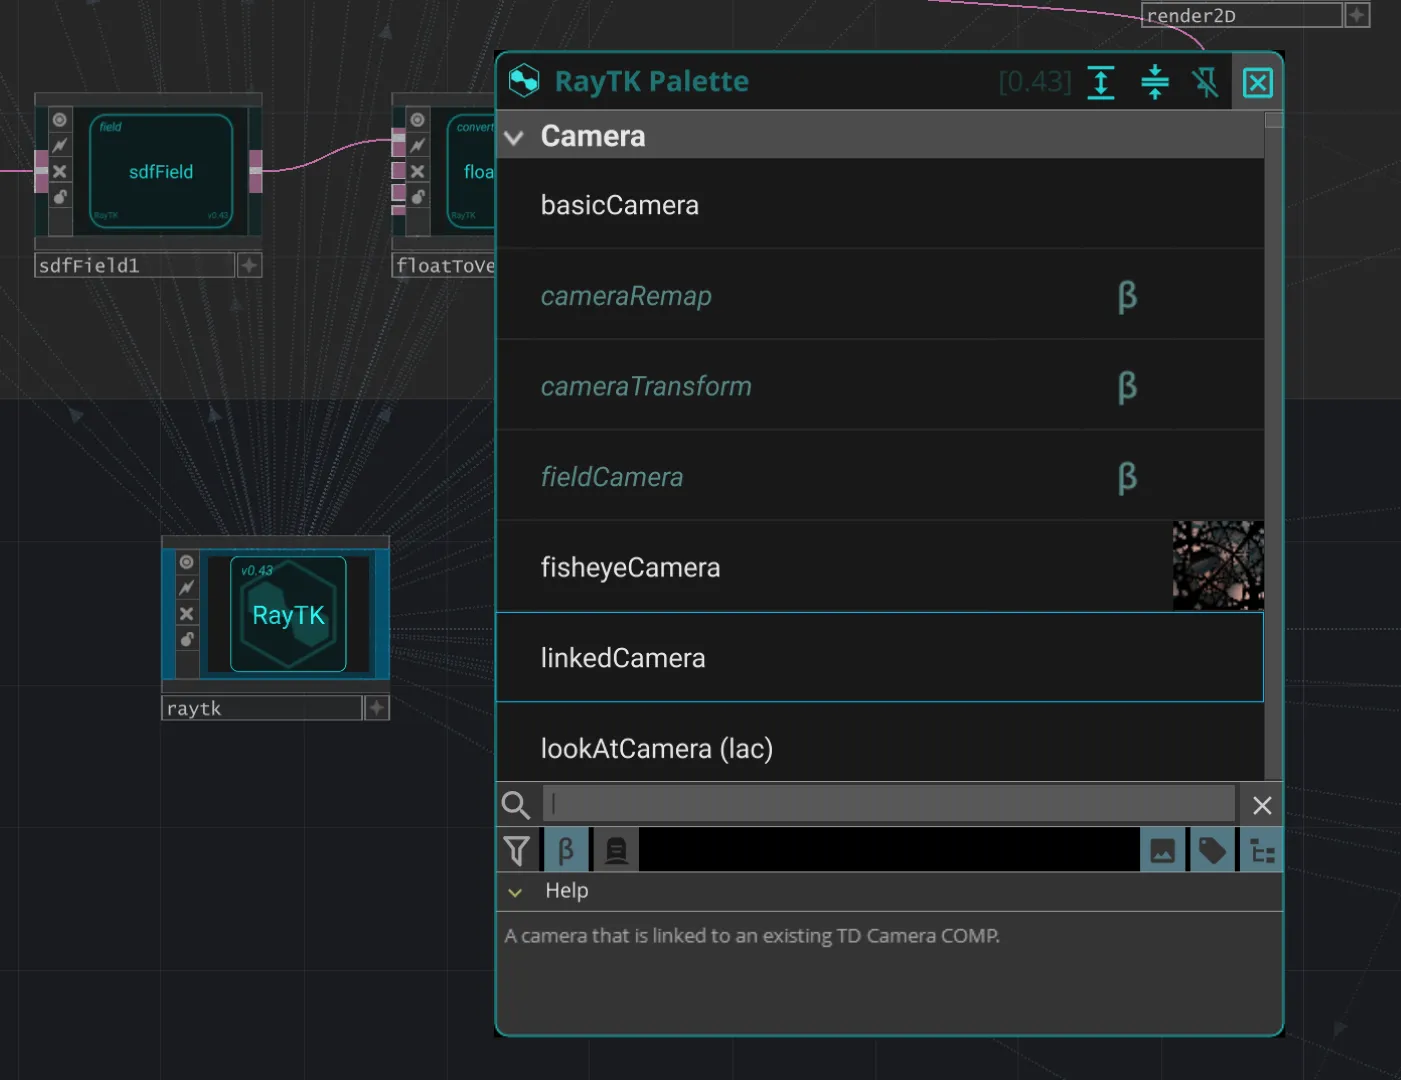
So, how does this tool work? When you download RayTK, you get this node for TouchDesigner. You stick it in your scene, press Alt+R, and it pulls up a palette. These components are different from the usual palette in TouchDesigner, and they don’t really work with the other nodes in the traditional way. When you’re building something, you mostly use the RayTK operators, and then once you’ve rendered it, you can use TouchDesigner’s regular tools. For example, I’ve cut up my render and put it on four virtual walls, colorized it a bit, that kind of thing.
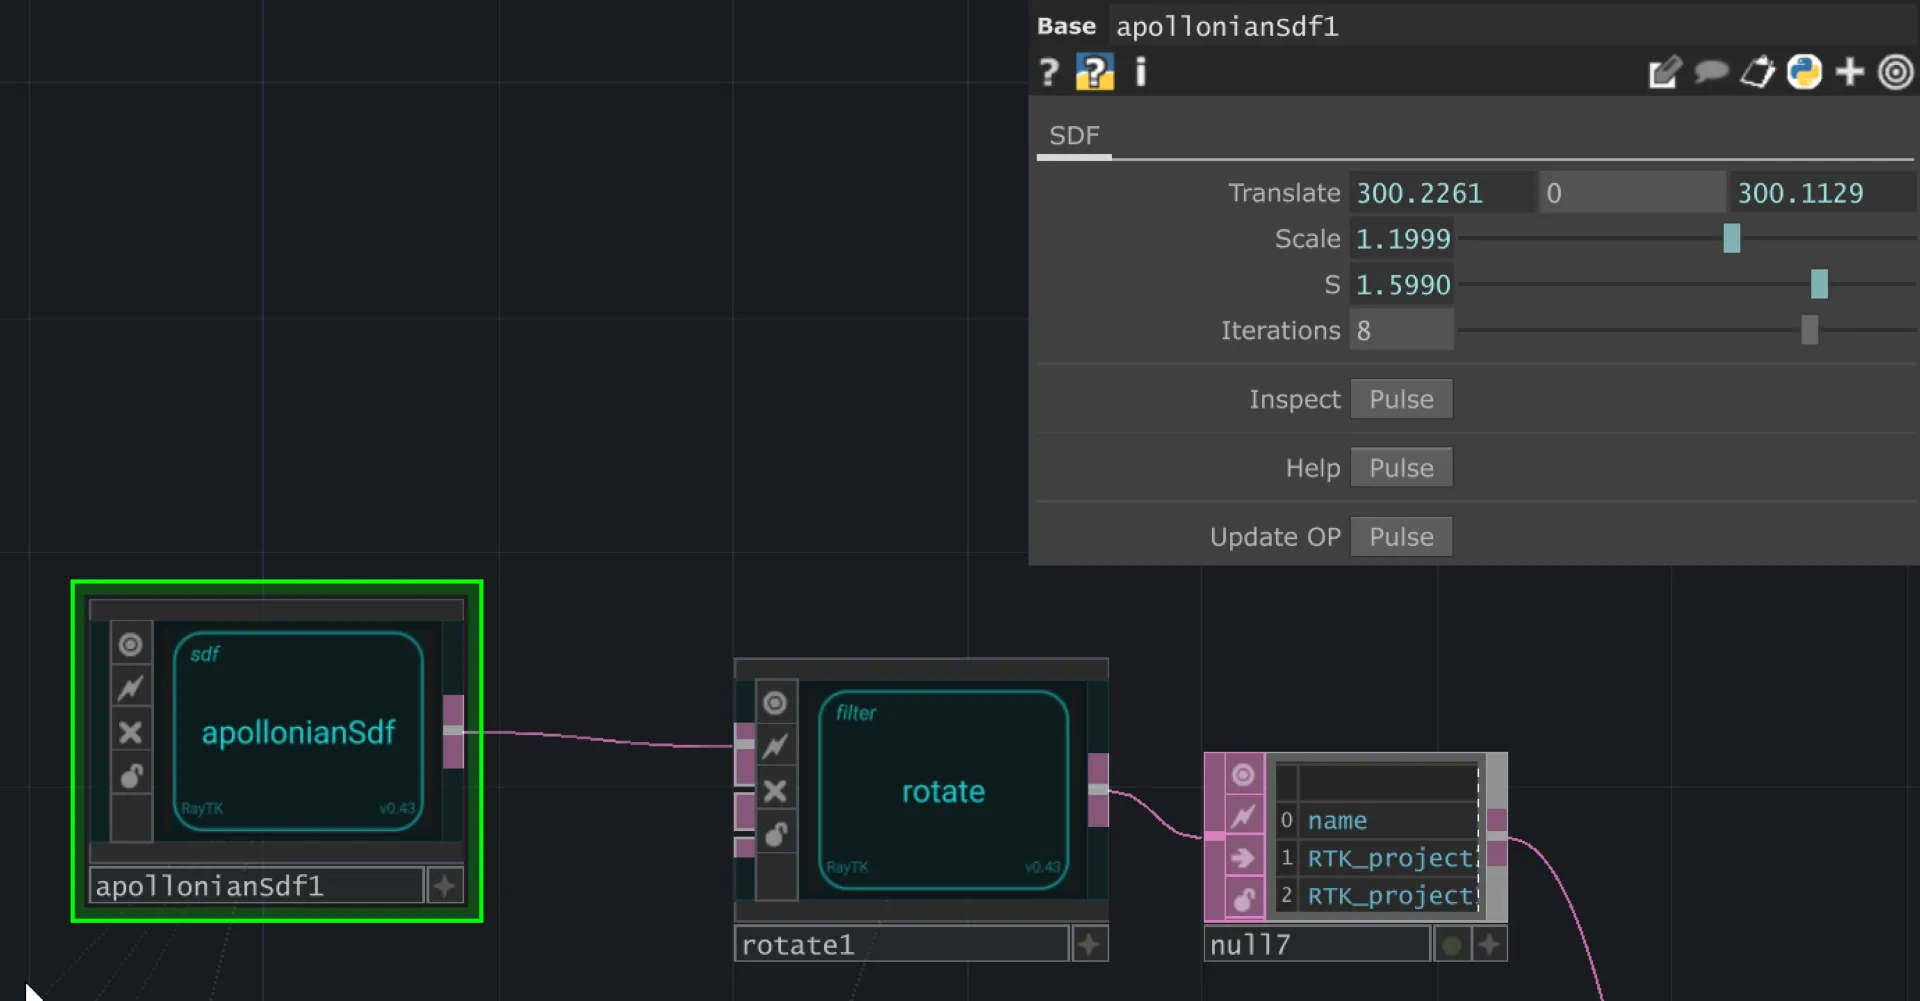
I’ll explain how the simpler scenes work—the ones I said looked better. Here’s what makes up that whole scene: I used an SDF, which stands for Signed Distance Function. It’s basically a mathematical formula that describes a shape, or more specifically, the distance from any point in virtual space to that shape. Inigo Quilez has a good explanation of it. So, this scene is just a fractal that’s rotating on the Y-axis, and I’ve got sliders that let me tweak parameters like the scale and iteration to control how complex the fractal looks.
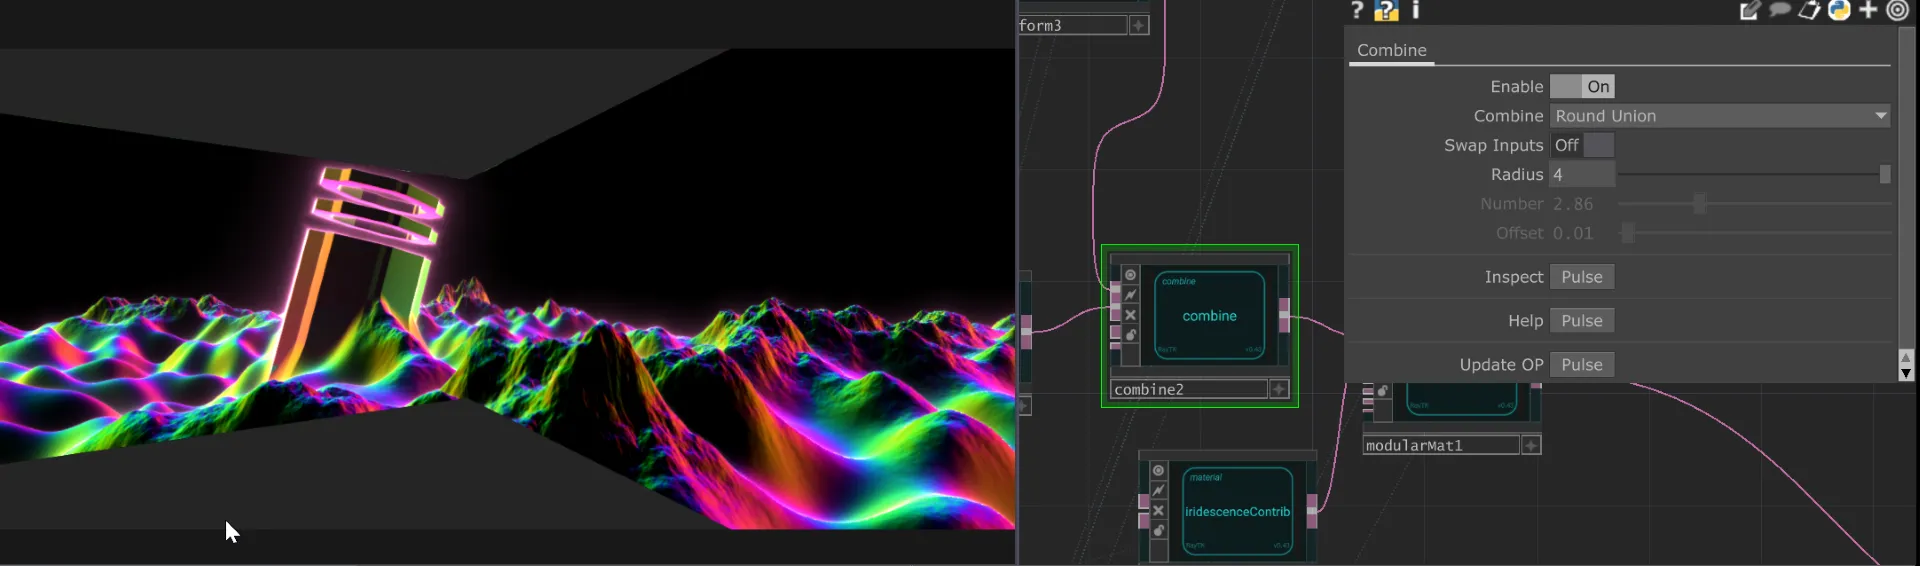
One neat thing about raymarching is the ability to combine shapes using unions. So, if you can represent a shape mathematically, you can combine it with other shapes really easily. You can even smooth out the edges between the two shapes to blend them. In my scene, I’ve got two shapes that are moving independently, but they’re smoothly combined along their edges. I used a “rounded union” for this, which lets me control the radius of the blending.
For that particular scene, I also layered two different sets of noise, and at the peaks of the mountains, the noise gets more complex. It’s hard to describe exactly what I did since it’s been a while, and I kind of just did it in a bit of a fugue state, but there are definitely some glitches, like visual artifacts that happen when there’s too much detail. It ends up warping in a way that’s kind of cool.
TouchDesigner, with RayTK, has been a fun way to play with raymarching without diving too deep into the math. There’s this whole culture around creating demos with techniques like this, often with tight constraints like making everything fit into 64 kilobytes. People try to create the coolest visuals they can, with music and everything, all in a tiny amount of code. I saw this one demo of a simulated marble race, done in a single fragment shader. It was created during a demo party, using the exact same techniques I just showed you.
I’m still figuring raymarching out, but I’ve been hyped about it for a while. I’m not the best at it, but it’s been fun.
Q&A
Someone asked why I didn’t use TouchDesigner’s audio-reactive features for the visuals.
Last time, I tried doing audio-reactive visuals in the browser, but latency was a big issue. Even with TouchDesigner, you ideally need a dedicated sound card. I’ve noticed that a lot of VJs go for beat matching instead of audio-reactive visuals, and that’s what I went for here. It gives you more control over the timing.
Someone also asked if I’ve played with Shader Park for TouchDesigner, which is another raymarching system, mostly in JavaScript.
I haven’t yet, but I’ve heard of it. I know there’s UP5 stuff for Shader Park too. I like the node-based setup in TouchDesigner—it makes sense to me because it matches how I understand the technique.
Anyway, there are lots of cool connections people make between all these different libraries and TouchDesigner. There’s even another library called T3D for TouchDesigner that’s good for volumes—like if you have particle sets and want to do cool stuff with them, you can raymarch through them to create volume textures. It’s neat to see how far you can push this stuff.
